DIY Floor Sanding Versus Professional Floor Sanding
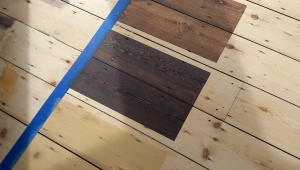
Do not take a chance with your hardwood floors. Hire a professional floor sanding company and have it done right
DIY Floor Sanding Versus Professional Floor Sanding
The question is not if the professional floor sanding is better than DIY floor sanding, the question is, how fussy are you about the final result? Sanding any hardwood floor is not extremely hard but there is alot of professional skill involved in achieving a streak free and scratch free finish. From our experience, rarely if ever, a DIY floor sanding project ends up looking perfect. Some come close. Some are not so close. While others fail dramatically. If you are sanding your own floors, then failing is not a big drama. But if you are sanding other peoples' floors and you mess it up, you are in trouble.
What Can Go Wrong?
Sanding a fancy engineered wood or a hardwood floor will require the use of some type of floor sanding machine. There are two types of sanding machines, belt sanders and drum sanders. Up to here all good. The issue is that you are unlikely to own a floor sander so you will have to hire one. Most hire centres hire out old and dated drum sanders that are very light, decalibrated and unable to sand properly. Not all are bad, but a lot of them are. Sanding a strong old solvent floor with these sanders is nearly impossible.
Sanding any type of hardwood floor is a fine gradual process. You need to start from 40 and go to 60, then 80, then 100 and then 120. Each grit missed can really mess up the final result. To be able to sand the surface to a scratch free finish requires years of training and experience.
Applying the finishes is also challenging. The floor has to be sanded to perfection before lacquering or oiling. Any imperfection or issue on the wood surface will be made much more visible by the lacquer or oil. The primer has to be applied evenly, allowed to dry and then the lacquer has to be applied in the right sequence to avoid overlapping.
Knowing what sealer to use on what type of floor is also essential. Not all types of floors can be stained, some need to be darkened up to create a rich finish instead of being kept natural. Some single pack floor lacquers are not compatible with some primers and are definitely not compatible with oil based floor primers.
Sanding the wood is not an easy task if you have not done it before. The aggressive types of sanding belts and discs are eating away the old sealers but at the same time, it scratches the wood very deep. Step by step, those scratches have to be removed gradually with finer and finer sanding discs until the wood is spotless, scratch free and finished with 100 grit sandpaper that makes it ready for sealing. Ignoring or skipping grits will end up showing scratches under the sealers.
The waiting times are also essential. There is a precise waiting period of time between all the coatings. Sanding too soon after the initial application, walking on a wet surface or missing patches can end up creating a patchy finish.
Ignore all the online videos that are advertising easy-peasy floor sanding and 90 year old ladies refinishing hopeless looking hardwood floors. 99% of that is advertisement generated by the hire companies. The reality is that finishing a floor to a perfect finish takes time, skill and good quality equipment.
The Verdict?
Statistically, going by ChatGPT or Google, over 50% of the DIY floor sanding projects end up bad or having to be re-done by a professional floor sanding contractor. The other 50% that are not considered failed, are finished at different levels, from mediocre to acceptable. A floor sanding project is something that is only done once every 10-15 years. Getting it done right from the outset can save a lot of money and prevent oversanding the wood. Our recommendation would be to actually assess yourself and how handy you are. Do your maths, add the cost, time and the expected rate of success, and only then proceed.
***Remember. You will need to hire a sander, an edger, buy all the sanding paper, move the furniture, repair the wood, buy the brushes, rollers, buckets, handles, the primer, the lacquer and other small items. Then prepare for a few days of intense work***