authors

Author Blogging 103: Guest Blogging, or How to Write for Exposure

Everyone agrees that authors should be blogging to promote their carers, but no one can agree on exactly how or why one should go about it.

There’s loads of outdated and bad advice out there, including posts telling authors to writie to SEO keywords as a way of selling books, counterproductive and just plain bad advice on how to find sites for your guest post, and even posts that are long since out of date but still rank high in search results for “author guest blog”. (And then there is all the great advice intended for bloggers, advice that doesn’t quite mesh with authors’ goals.)

I was reading some of that bad advice recently when I realized there was very little good advice on this topic. (You can find links to several good posts in the comments of this blog.)

So how exactly is an author supposed to go about guest blogging?

I can’t speak for other experts, but I have been blogging for 8 years and guest blogging for 18 months. Here is a distillation of the what, the why, the how, and the when of my guest blogging philosophy.

What (Your Goals Should Be)

The goal for writing a guest blog post is to write a great post. That’s it.

Some people will tell you that you should use a guest blog post to promote yourself, or that you should sell your book, but they could not be more wrong. A guest post needs to be entertaining, or useful and informative, or thought-provoking – or all three, if you are up to it.

Ideally you should be just as serious and professional about your guest blog posts as you are with your books. They’re not how you pay your bills, so I can understand why you might have a lower regard for a blog post, but those posts will matter to the bloggers you want to work with.

The folks who run the blogs you want to write for care about the quality of the posts they publish. A half-assed blog post will be declined, a blatant advertorial will be rejected, and any self-serving post will alienate readers and thus fail to accomplish your goals.

Why (You Are Doing This)

Guest blogging is about the long game. It’s not about selling books, or promoting yourself. It’s about establishing your credibility and becoming more widely known. You’re not out to find new book buyers, or new book readers; this is about growing your audience (hence the no self-promotion rule).

You don’t want to sell a book to the person reading your post; what you want is for that person to share your post online, and keep an eye out for your next post, and share that one as well (this is why each blog post deserves your best effort).

The thing is, you will have no luck getting the person reading the post to buy your books if they only read SF and you only write fantasy, which is why you shouldn’t even try. But if they like your blog posts they will share it and eventually that will end up in front of fantasy readers.

How (You Go About Guest Blogging)

Okay, now this is the hard part.

There are many experts that will explain how to find guest posting opportunities by searching for the relevant keywords in Google. Or, they might direct you to sites where blog owners create listings to ask for guest bloggers.

Either of these approaches will help you find opportunities, yes, but they are absolutely the wrong approach for authors. Remember, the long term goal is to find readers and fans, and you can’t accomplish that goal if the post never ends up in front of the right audience. That’s why you should not use a scattershot technique and submit a guest blog post just anywhere; the more effective technique is to only submit posts to sites where your potential audience will find them.

Finding the right site, and then figuring out what they want you to write, now that is the hard part. (As soon as I have this nailed down, I will tell you.)

What you’re going to have to do is, in the words of one marketer I know, “lovingly stalk” your readers.

You need to find out what sites they visit, where they get their news, and generally what they are doing online. Twitter is a great way to find this info – if you have a lot of followers. Or, if you read the same types of books as your audience, you can examine your web activities (this type of introspection is not easy).

If all else fails, you can always invite one of your beta readers out for coffee and ask them what they’ve been reading online lately.

Once you have that list of sites, cull all the sites that don’t accept guest posts, and then start lovingly stalking the sites you want to work with. You need to identify where your abilities and their needs intersect so you can craft a killer blog post and get it accepted.

When (Your Post Has Been Published)

Congratulations on getting published; that was quite the accomplishment, but your work isn’t done.

After your guest post is published, you need to hang out in the comment section and answer questions from readers. You should also help promote your guest post by sharing it on social media.

If the post does well and brings you a lot of new readers, you should talk about future guest posting opportunities with that blogger. If you have the time and energy, you should develop ongoing relationships with the more popular sites.

Further Reading

  • Why You Suck at Guest Blogging (and What The Pros Do Differently) (Smart Blogger)
  • How to Use Guest Blogging to Promote Your Book (Jane Friedman)
  • 8 Old-School Blogging Tactics That No Longer Work (Smart Blogger)

image by ThoroughlyReviewed via Flickr
How to Design a Fantasy or SF Book Cover With Canva in Five Minutes or Less

No matter the topic or genre, every ebook needs a killer cover. It’s the first thing that a reader sees and the right ebook cover – or rather the wrong cover, or an amateurish hack job – can make or break a sale.

Some authors spend hundreds of dollars for each book cover. Others make their own.

If you ask me, I think authors should learn how to make a book cover, and then go out and hire the best cover designer they can afford. That experience stretches their creative muscles and it will help them appreciate the work involved in making a good cover.

I taught myself how to make ebook covers over the course of a couple Sunday afternoons. While I don’t plan to make covers as a service, the experience has taught me that it’s really not that hard to make a good cover. (A great book cover, on the other hand, takes more skill and experience than I currently possess – but I am working on it.)

In this post I am going to explain how you can make a book cover in five minutes or less.

Making a great cover may require an expert, but I have found that if you work with the templates on Canva you will make a good book cover.

Here are a few things to keep in mind.

  • You don’t have to use the first cover you make – you don’t even have to use the twenty-first. In fact, you shouldn’t. Book covers are the kind of thing where it pays to take the time to get it right. You don’t want to end up on one of the blogs that collect bad book covers, do you?
  • If you’re developing a series, it would be a good idea to plan for using similar designs on all the book covers. This will help tie your books together visually.
  • If you have the time, create two distinctly different covers for the same book, and then A/B test them. Ask your test subjects which one they prefer, and why. You can use the feedback to refine the most popular cover, and perfect it.

First Things First

Gather your tools and supplies – in other words, choose an app or online service to make the cover with, and also find the images you want to use on the covers.

I had previously published a post with a list of 14 sites you could use to make book covers, but the one I use all the time is Canva. It is a free (for the most part) online alternative to Photoshop. You can use it to make just about anything from an infographic to a business card, and it is easy to use.

Canva has a pretty shallow learning curve; if you know MSPaint, you can learn Canva. In fact, they’ll even teach you how to use it in a series of tutorials.  (I didn’t find them until I started working on this post, darn it.)

If you are looking for a source for images, here is a post that lists fifteen royalty-free stock photo sites. In the long run you’re probably going to need to also license paid photos, but for now the free sites – plus the images, layouts, and elements available through Canva – will be enough to help you learn the craft.

And finally, Derek Murphy has compiled a list of fonts you might use on book covers. He organized the list by genre, making it a lot easier to find the best fit for your book. You might not be able to find exactly the font you like, but Derek’s post will give you an idea of what the title of, say, an SF book should look like.

Let’s Get Started

When I set out to make book covers, I just started messing around with the tools, making ugly covers and learning from my mistakes, but what you should do is first look on Amazon to see what book covers look like for your genre or topic. For example:

  • Romance titles frequently have people on the cover. Contemporary romance will often use a photo on the cover, while historical romance will use a posed shot showing the main characters.
  • Titles in the fantasy genre typically fall into one of several broad categories: their covers show a group of warriors in chain mail, a landscape shot of a valley or castle, a plain cover centered on an occult or heraldic symbol, etc.
  • Many science fiction titles have covers that fall into categories similar to fantasy categories, only with different symbolism. Instead of a valley or castle, SF uses spaceships and planets, and rather than chain mail SF relies on showing the heroes in spacesuits to tell the reader about the book.

The observant reader will have noticed that I am over-generalizing cover designs and glossing over a lot of the nuances.

Yes, I am, and that is okay because what I want you to see is that all it takes to make a good cover image is to match an acceptable font with a background color and foreground graphic or image.

That simple cover design will work for SF, fantasy, and sometimes thriller novels. It’s not the most sophisticated cover design idea, but it is a great first step because it is so simple. (And if you take pains to do good job, you will create a cover better than a lot of indie titles.)

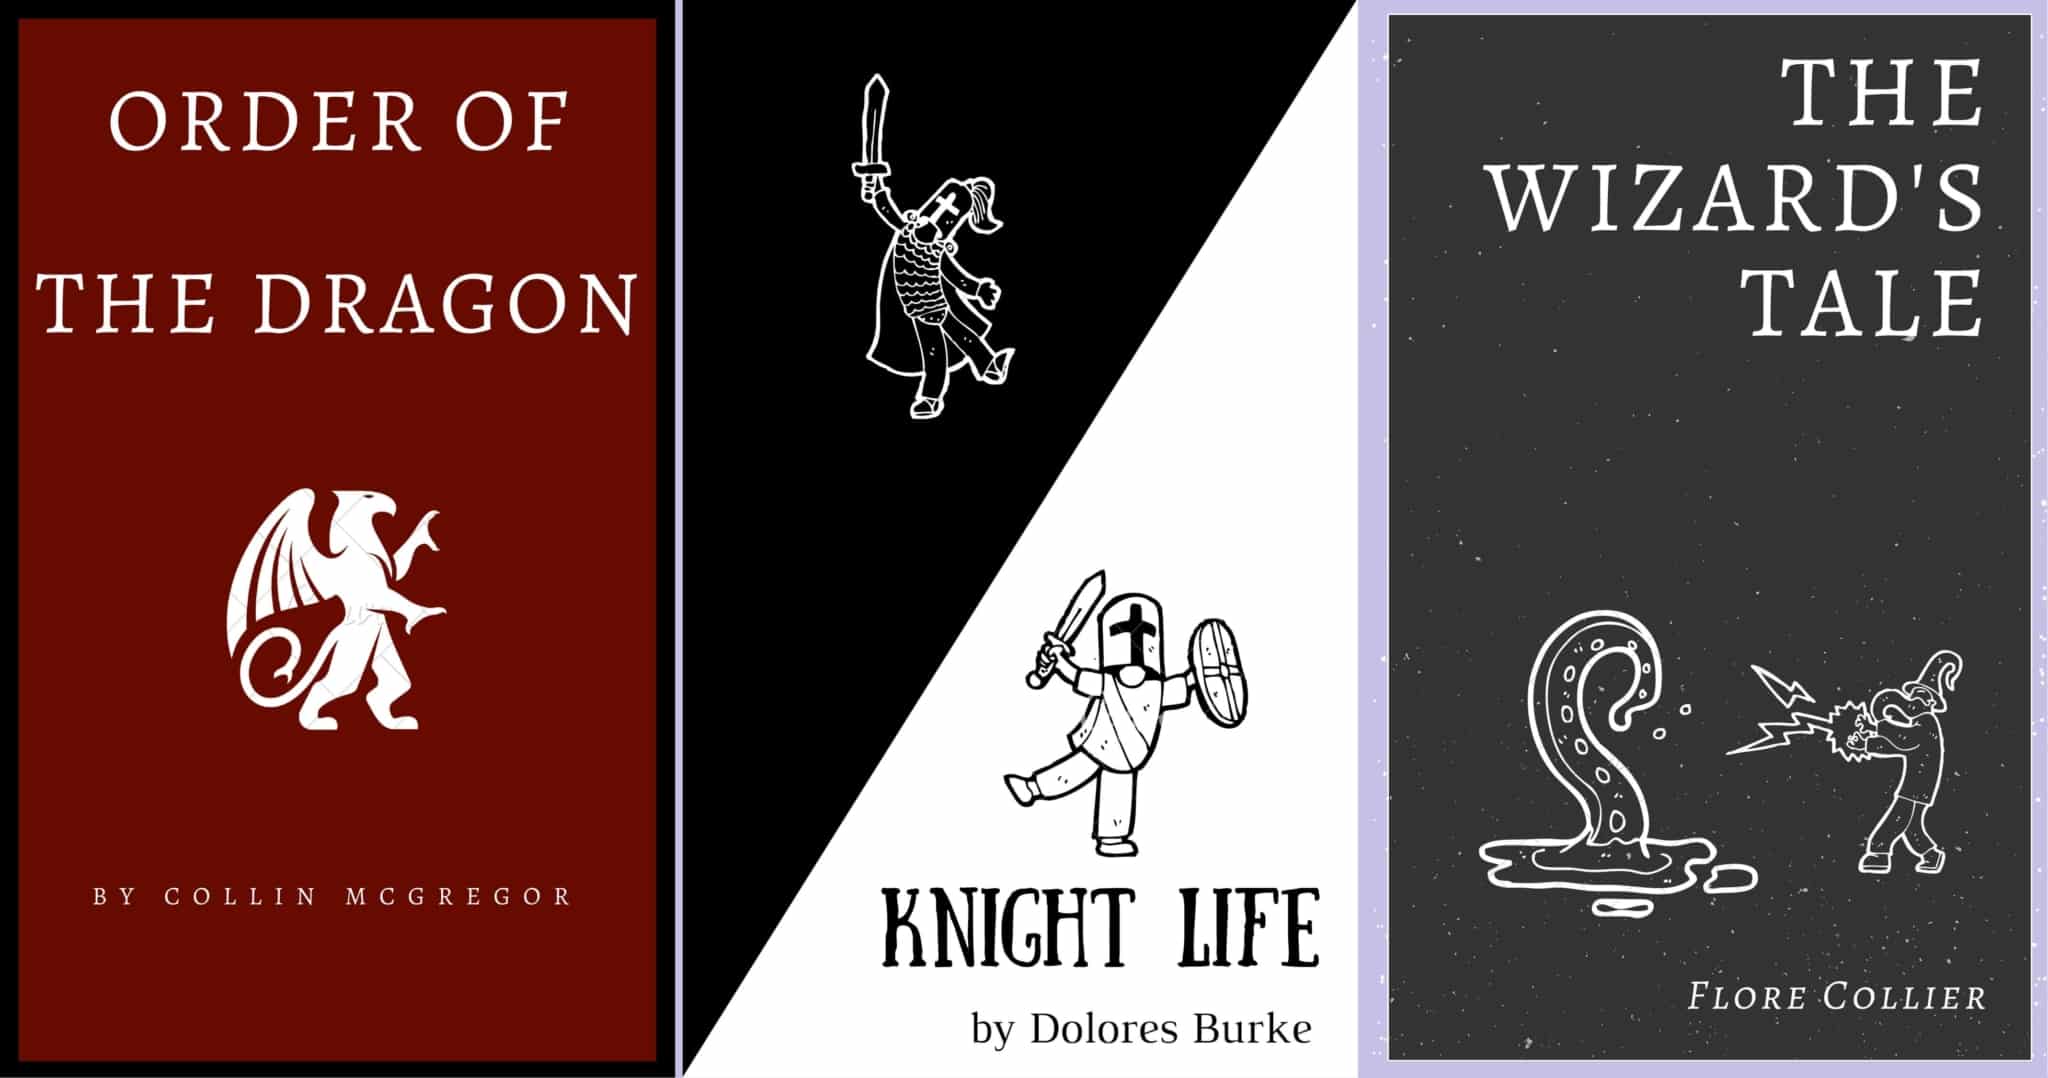
Here are a few covers I made while working on this post.

You can make this cover by following 4 simple steps:

  1. find a stock cover with a monochrome background,
  2. change the title font to one suitable for the genre,
  3. change the background color, and
  4. add a simple image in the foreground.

It is about that simple.

Why don’t you give it a shot, and then share your work here?

Checklist: Eight Items to Include in an Author’s Book Listing

Comments and feedback on my post on bookshelf plugins for WordPress taught me that many authors still build a critical part of their website, the pages for each of their books, by hand. I like using said plugins because they make it easy, but I have built a few book pages by hand for a site hosted on Squarespace.

Building a book page freehand takes more work, but it also gives you more opportunity to tweak a design so it fits with a particular author’s style or with the book.

Here’s the checklist I put together to make sure I don’t miss important details. Do let me know in the comments if I left something off.

  1. Cover Image – Do you have a large cover image ( > 1500 pixels tall)? You will probably end up using a smaller cover image (300 to 500 px tall), but you will need the larger image so that you can set it as the featured image (if the option is available). And you’ll want to keep a copy of the larger image just to give yourself options.
  2. Description – Usually around 200 to 400 words, this is what tempts readers into reading reviews, checking the price, and maybe adding a book to their TBR pile. It would be best to use original content, but in a pinch you could reuse the description from the book’s listing on Amazon and other retail sites.
  3. Metadata – This is one area where using a bookshelf plugin helps a lot. Most plugins will give you a form to fill out, making it easy to remember all the details, but if you’re building a book listing by hand then you’ll need to remember to list all of the relevant metadata, including the title, author name, genre publication date, page count, etc.
    These details might not seem important, but the page count, for example, tells readers whether to expect a short story of fantasy epic, and details like the title are important to anyone using a screen reader.
  4. Excerpt – This is the 1,000 to 3,000 snippet of the book that will give readers a taste of the writing style without giving away too much of the story. It can be hard to embed such a large body of text on the same page as the rest of the book listing, which is why the excerpt is either on a separate page or at the foot of a page. One might also choose to use Amazon’s preview feature for the snippet. This works as an embeddable widget that can expand to cover the entire screen, and includes links to the Kindle Store.
  5. Audiobook excerpt – If you have an audiobook, you can upload a snippet to SoundCloud and embed that snippet on the book listing.
  6. Reviews – If the description and excerpt haven’t sold a potential reader on your book, reviews might. Carefully read your reviews – even the negative reviews – and copy the best parts as quotes. List those quotes on your book’s page, and link back to the reviews – and yes, this includes the negative reviews (maybe). One man’s trash is another man’s treasure, and the reasons I hate a book might be inspire someone else to buy it.
  7. GoodReads – It is always a good idea to link to GoodReads, as it is the single largest source of reviews.
  8. Buy Buttons – The whole purpose of this page is to get someone to buy the book, so of course you need to include link to sites where the ebook, audiobook, and print book can be bought.

image by Ole Husby

Review & Roundup: Seven WordPress Plugins for Author Bookshelves

Author websites come in many shapes and forms, and can be found on just about every platform from Squarespace to WordPress, but the vast majority share at least one common feature.

Generally speaking, they all need to display the books an author has written, or is working on.

Authors with a site on Squarespace, WordPress.com, etc, will have to build a book listing page by hand, but this is one area where self-hosted WordPress websites excel.

Edit: If you’re building a book page by hand, here’s a checklist of what you should include.

Authors with a self-hosted WordPress site have any number of options for listing their books on their sites. They can either use a theme like Preface, and use its built-in features to create book pages and book shelves, or they can use one of the following plugins.

(If you would like to use a theme with a built-in bookshelf, you can find several on ThemeForest.)

I recently undertook a survey of bookshelf plugins so I could recommend one to a client. There aren’t a lot of options, but I did find a couple great plugins.

Tl;DR

My top two choices are Novelist, because it’s free and I really like it, and MyBookTable, because its users can’t stop themselves from recommending it.

When I look at bookshelf plugins I try to keep three requirements in mind:

  • The plugin has to look good on my site, and include both bookshelf pages and book pages
  • It has to be easy to use.
  • It needs to have widgets that I can use on to automatically display book covers and blurbs the front page of my site, and other pages.

The last feature might not sound important, but I have found that I want to build front pages that promote the latest book, or perhaps a series. I think it’s an attractive design element, and a lot of authors like – with good reason. It helps them promote their work.

Here are 7 WordPress plugins that authors can use to list their books on their sites, and some comments on my experiences with the plugins.

WordPress Book List

No one is using this plugin, which is shocking because it is my first choice. This is one of the two plugins you should install first and test before trying anything else. The free version looks good, and the paid version gives you extra layout options and several useful features, all for $22.

It does not have the widgets, but I like the rest of the plugin enough that I sometimes build the widget manually.

Edit: I just built a bookshelf with a half-dozen books and suddenly I like this plugin a whole lot less. I was going to st up a demo but it was honestly so frustrating that I don’t want to spend more time getting it right.

Novelist

This is the second of my preferred plugins. The free version is great; it lets you reorganize the book listing layout to your own design, and it even includes many of the features other plugins would ask you to pay for.

As you can see in the demo, a book listing takes up a lot of space on the page. This plugin begs for a theme with a lot of whitespace, so it’s not going to work for everyone.

MyBookTable

This is one of the less commonly used plugins, but I know of several authors who use it, and I must admit that it looks great on their sites. I have not used it much, though, because I found that the free version is missing too many features. For example, the Amazon and B&N buy buttons are only available with the $49 Pro version.

I’m sure the Pro version is great, but I have yet to see a reason to invest in it. The thing is, competing free plugins have the features I want so I use them instead.

Genesis Author Pro

StudioPress is one of the more well-known premium WordPress theme developers. I think their themes are over-engineered Rube Goldberg machines, but I won’t dispute that they are very popular and also reliable.

They make an author theme called Author Pro., and they also make a matching free plugin called Genesis Author Pro. This plugin can be used with StudioPress’s other WP themes to add book listings and bookshelf pages.

If you have a StudioPress theme then you should try this plugin first – it works, and looks professional. If your theme was made elsewhere then don’t bother; this plugin was made to only work with StudioPress themes.

MooBerry Book Manager

This is a highly rated but not a widely used plugin. I liked it. I thought it was easy to figure out, and that its book pages looked good. It included both custom bookshelves/collections and let you display book covers with a widget (the widget wasn’t really worth using, though).

Alas, I had to stop using it once I realized that it was causing conflicts on a couple different sites I was building.

GS Books Showcase Lite

This is another one of those plugins where the pro version looks great but the free version is so limited that I didn’t use it long enough to decide if I wanted to invest in a license.

I did check, and apparently the developer is no longer selling the pro license. (The developer’s own website is broken, which is a good argument against paying them for a license.)

Book Showcase

This plugin doesn’t do anything useful and has limited features. Don’t even bother trying it. (Reviews should ideally be longer than this, but let’s not waste any time.)

199+ Plot, Name, Story, and Other Generators

As any author can tell you, coming up with names and ideas for a story is sometimes more difficult than writing said story. The process of inventing names is a critical first step akin to looking at a blank sheet of paper and trying to find that first word.

I’ve developed on my own method for coming up with names (it’s a variation of the porn star name game) and I have shared a handful of tricks for naming websites.

But those methods won’t work for everyone, and they won’t help you with problems like thinking up the plot for your next novel.

Fortunately, I can help.

One of my ongoing projects are turnkey websites for small publishers (here’s one). I’ve gotten pretty good at thinking up names for the companies, but I still struggle to write original and good quality content for things like the about page, book listings, staff names and descriptions, and so on.

I have not invented as many names and descriptions as your average George RR Martin novel, but I have had to come up with enough names that I went out and found ways to automate the process.

Here are a few of the plot, name, summary, and other text generators websites that I have found useful.

Edit: Do you need a map of a fictional land or city?  I found a couple Twitter bots that post randomly generated maps.

Edit: Here’s a more detailed map generator for medieval cities.

Rum & Monkey

This site has over 30 name generators, all specialized for a certain niche. There’s Mormon and vampire name generators as well as generators for military code names; Korean, Thai, Arabic, Elfish names; and many more.

Perhaps my favorite one (after the "behind your back" generator) is the one that told me my stripper name was Thunder Down Under .

Generator Land

You won’t find many book-centric name generators here but this site does have any number of "outside the box" idea generators including ones for startups, sports drinks, story plots, Jame Bond villains, Kung Fu movies (Stuttering Fists , Raging Farmer), and more.

This site will even let you make your own name generator. I haven’t had a chance to test this option but it could be a great way to come up with truly unique and relevant names.

Plot Generator

If you need a random story summary for a book then this is your site, but I wouldn’t use it too much. This site has almost 2 dozen genre-specific generators, but they’re not very good.

Each generator has a single template, which means if you use the horror story generator six times you will get six very similar summaries. I found I had to edit most summaries so they were unique, but I did still use this site.)

Name Generator Fun

This gaudy looking site contains 29 name generators for various fantasy and SF fandom. For example, it told me my Star Wars name was Sham Disyvan, and that I was a rebel pilot from Derra IV.

This site might not appeal  if you’re not writing fanfic, but I for one like the off the wall suggestions. If nothing else, the names will be unique when used outside the intended fandom.

Seventh Sanctum

I was trying to count the number of name and other generators on this site, and lost count at fifty. This site’s owner has been building them for a couple decades, so there is bound to be even more.

It’s worth your time to check out all of this site’s generators; they range from anime to location settings to spells, and tech.

? ? ?

So what is your favorite name generator?

The five sites mentioned above include over 200 content generators, and I’m sure I only scratched the surface of what’s out there.

What do you use to generate names?

How to Save $39,000 When Choosing a Domain Name for Your Author Website

It is a truth universally acknowledged that an author in possession of a book must be in want of a website. They need a home on the web to call their own, one safe from the fickle whims of Facebook’s algorithms.

That home will need a name – but what to call it?

Like the Chinese word for crisis which is erroneously described as consisting of the words “danger” and “opportunity”, choosing the domain for an author website comes with both great risks and high potential rewards. It is a way for authors to brand themselves online.

So what are your options?

Some authors choose to go with the perfunctory choice, but others choose a domain of a more personal nature, or a whimsical one.

The Mundane

Well, you could go for the obvious and staid choice such as the author’s name, book series, character name, or book title. Those options usually work well – the author name is a great default that brings all (most) of an author’s work together on a single site (but it might exclude pen names), while naming the site after the book series or main character might add a small boost to SEO.

Edit: Some will insist this is the only way to go because if the author’s name isn’t in the domain then it won’t be found in search results. This is simply not true; the right SEO will make sure that a search on an author’s name will lead to their site.

I named my blog The Digital Reader because it referenced the topic I wanted to cover: digital reading, in its many forms. It is a decent choice, but it is not without its problems. For a number of years people kept confusing me with a competitor who has a similar first name and blog name. (If I had realized that would be an issue, I’d have chosen a different name.) Also, I never did get the domain I wanted – I had to go with the-digital-reader.com because domain squatters were demanding exorbitant fees for the domains DigitalReader.com and TheDigitalReader.com.

One of the domains would have cost me eight grand, and the other is listed at $39,000. (In fact, I just got an email asking me if I were interested in the domain, hence this post).

I feel paying $39,000 for the domain would be a huge waste of money, which is why I have never gotten those domains. A lot of web people agree with me, but if your favorite domain has already been registered, and you can get it for a fair price, you might want to spend the money.

The Topical

If you don’t want an obvious title, you could go for a more topical title. Rather than use a domain that explicitly references an author’s work, the author might choose a domain that is in some oblique way connected to the work.

For example, when I considered launching a site that reviewed the Chinese takeout places in my area, a friend recommended that I use the name TheOysterPail.com. This domain references a little known fact that the little white boxes that Chinese food comes in were originally created to hold shucked oysters, and were called Oyster Pails.

I ended up using the domain for my humor blog after I was told that NO, I could not buy and review that much Chinese food.

Speaking of that humor blog, did you hear about McDonald’s buying the domain EIE.io?

Another way to come up with a topical title is to use the “And Method”. This is a trick for coming up with unique names where you combine two otherwise unrelated words, and in this situation an author might choose two words that hint at their work.

Swords & Sorcery, to name one obvious example, suggests a D&D-style fantasy, while Coffee and Corpses hints at police procedural, or detective stories. And then there is Death and Texas, which is both clever word play and possibly a topical reference to for author whose mystery novels are set in Texas.

The Whimsical

But you don’t have to go for the topical or staid choice; you might instead go for the whimsical or the personal.

When it comes to the personal, you might use your online handle as your domain name – a suggestion I have made to a number of Twitter users. The benefit here is that you get to build your author identity on top of your established online identity, giving readers a feel for the person behind the name.

Edit: Chris Meadows mentioned in the comments that Googlewhacking might be useful here. This was a game where you try to find a pair of words that gets only one a single Google hit. if you can find that pair of words, it would make for a unique domain name.

Edit: Over at The Passive Voice, PG writes that he has found a site called Nameboy helpful for locating good domain names.

On Nameboy, you type in a primary word and, optionally, a secondary word. Thereafter Nameboy generates all sorts of possible domain names based on those words. It lists them in a table that shows you which of its generated site titles are available as domain names and which are not.

Or, you might choose a name that references the work of your favorite author – for example, borogroves hints at Lewis Carroll – or you could come up with a whimsical name by combining random elements. For example, 3 Pugs and an Octopus is both unique and funny enough that it begs for people to ask about the story behind the name.

Any name that inspires questions is a great name because it is a conversation starter, and I can confirm that from personal experience.

I can’t tell you how many times I have been asked about the name Valiant Chicken, my WordPress business. As I explained in a blog post last year, I thought up the name while inventing new variations on the porn star name game.

I tell people that their first tech company should be named after their middle school name and their last meal, and that their Batman villain name is their profession plus the color of their socks, and use that spiel to establish a memorable first impression as a creative professional.

Edit: It took me three years to figure it out, but that was actually terrible advice. I should have listened to the people who told me to change the name.

I have been told that I should get rid of the Valiant Chicken name because it has no connection to WordPress services. Authors will receive similar advice that they should choose a domain that brands them as an author, and that advice is just as bad for authors as it was for me.

The sky is literally the limit.

Author Website Checklist

No two author websites look the same, but they all share a few common characteristics. Generally, author websites have to fill four needs. An author site needs to tell visitors:

  • what an author has written,
  • who the author is,
  • how to contact the author, and
  • what the author is writing next.

Before you launch your author site, here’s a quick checklist to make sure you have all the parts you need.

  1. Author bio – Have you posted a bio on your site, and does it include a photo? Readers want to know more about you, which is why you should post a bio on your site. You should include a photo as well as details about how you got into writing, what you do for fun, and other personal info.
  2. Books – People can’t become your fans if they don’t know about your books, and if you don’t list your books on your site they will never find out That’s why you should create a listing page for each of your books, and while you’re at it  a directory page and series summary.
  3. Mailing list – Your fans will want to hear from you when your next book is out, so you should give them the chance to sign up for your mailing list. Don’t forget to offer a freebie to anyone who signs up.
  4. Contact page – People need to be able to reach you so organizers can invite you to events, fans tell you they love your books,  and bloggers can ask about ARCs. That’s why you should have a contact page with a contact form and your email address.
  5. Social media – Have you added links to all your social media accounts? (It’s okay if you don’t have any, but you should link to the ones you do have.)
  6. Events – Have you added a calendar or some other way for fans to know when and where they can meet you?
  7. Home page – Your home page is the first thing new visitors will see, and you never get a second chance to make a first impression. That’s why your home page should tell visitors who you are, and include either a call to action or the cover of your most recent book (or both).

You don’t need to check off all the items on this list, although it would be a good idea to include all the details you think will be useful or important to your site’s visitors.

image by Amy Guth

How to Save $169 While Setting up the Yoast SEO Plugin for an Author Website

Author’s note: This post originally started out as the script and accompanying text for a video on configuring the Yoast SEO plugin. By the time I got done writing this, I realized that, one, the video would have been so long that no one would watch it to the end, and two, the video begs for a production quality higher than what I can pull off right now.

I plan to make that video one day, and I will likely use the following to write a couple three four five shorter, less comprehensive (but easier to understand) posts. In the meantime, here’s a comprehensive summary of what I will do when I set up the Yoast plugin for an author.

Ask any expert and they’ll tell you that authors should use their websites as a platform to promote their books, connect with fans, and give them a reason to buy.

That is good advice, but it only works if an author’s site can be found in Google’s search results. While Google will find and add just about every website to its search listings, installing an SEO plugin like Yoast can help a site move higher in the results, and it can increase the chance that someone will click on a link.

Note: the following tutorial was written for authors who have a self-hosted WordPress.org website. If your site is on WordPress.com, Squarespace, Blogger, or another hosting service, you won’t be able to use any of this. (Although, if you have an author site on Blogger or Squarespace, drop me a line. I am seeking a guinea pig who will let me see what can be done to optimize their SEO.)

I recommend the Yoast plugin. It works well, and its configuration wizard makes it easy to cover the basic setup process.

Yoast will charge you $169 to set up this plugin for you (I would charge you $50), but you can save that money simply by following the instruction laid out in this post.

First Things First

Before we get started, you need to pull together a list of all the relevant info:

  • Social media account URLs – Yoast is going to ask you to list all of your social media accounts. Experts tell me that taking the time to list all of your accounts will boost your SEO.
  • Meta description – This is a 2 or 3 sentence description of who you are and what you write about.
  • Meta keywords – this is where you get to tell Google which search terms matter to you. For an author, this would be your genre or subject, and the themes or topics found in your books.

The next step is to install and activate the Yoast SEO plugin. Upon activation, you will notice a new menu item in WordPress admin bar along the left side of the screen labeled SEO, with the Yoast logo next to it.

It looks like this:

Off to See the Wizard

The first thing you need to do is run the configuration wizard. This will take us step by step through setting up the plugin, and will cover about half of what we need to do.

Scroll down and click on Yoast option in the menu on the left side of the screen. Click on it to open the main Yoast menu, and then select the “general” tab.

Click the button labeled configuration wizard. This will take you to a new menu.

Before we go further, you should note there is a number bar across the top of your screen. The following instructions correspond to each of the 12 steps in this wizard.

After you complete each step, you will need to click the “next” button to advance.

  1. On the first screen, click the purple button. Yes, the other option is that you could pay someone to do this for you (me!) but you don’t have to.
  2. On screen #2, select option A. This sets things so search engines can find your site. If you are still building the site, you might choose option B and keep your site from being indexed, but I would not. My SOP is to choose A and then hide the site from public view with an “under construction” plugin.
  3. If you plan to blog regularly, select the first option on screen #3. Otherwise, I would select the last option.
  4. Since we are setting up an author blog, select the option for “person”, and then enter your name (or pen name).
  5. On the 5th screen, enter the links for your social media accounts. (You might want to pause the video.)
  6. Set the “Posts” and “Pages” as visible; this will tell Google to index them. Then set the “Media” as hidden. The thing about WordPress is that it will generate a separate page for each image you upload. If Google can see all those pages then Google will think you have a lot of pages with little content, and it could ding your rankings.
  7. If your site has or will have multiple writers contributing, click yes on the seventh screen. Otherwise, click no.
  8. You can skip this step. Just go ahead and click the next button.
  9. Verify that your site’s name is spelled correctly.
  10. Unless you really want to be spammed by sales emails, you can skip this step.
  11. These are just adverts where Yoast is trying to sell you webinars or additional services. You can ignore them if you like.
  12. Click the purple button to return to your site.

Okay, we’re now about halfway done with setting up this plugin. You could stop here, and call it good, or you could change a few settings and squeeze the last bit of SEO juice out of this plugin.

Now the Real Magic Begins

A. The next step is to scroll down the page, and look in the Yoast menu again. Select the “titles and meta” option under Yoast.

  • Make sure that the “rewrite titles” slider is purple for disabled, and click save.
  • Then click the “other” tab. Make sure that both the “index” and “enabled” are purple, and then click the save changes button.
  • Now select the “home page” tab. If you have your front page set as a blog, this is where you enter the site’s meta keywords, and the site’s meta description.
  • Note: If you see a link rather than an text boxes where you can enter the meta description, that is because you have a specific page set as the home page. Click that link, and it will take you to the page so that you can enter the meta description, and meta keywords in the Yoast boxes.

Here is a screenshot showing where to enter the meta description and meta keywords for a specific page/post. You’ll need to click the edit snippet button to enter the meta description, and the meta keywords have their own text box lower on the page.

You really should take the time go enter the meta description and meta keywords on your home page. The keywords will help your rankings, and the description will be used by Google – it will be shown in search results.

For example, here’s the meta description for Jane Friedman’s site:

Interregnum: iI you made it this far, congratulations. My eyes would have glazed over by now. Reward yourself by blinking a few times.

But don’t give up yet, because there are a few more settings that need work.

B. Now we need to turn our attention to Yoast’s “social” menu. Scroll down the page, and look in the left menu bar.

Select the “social” option in the Yoast menu. This will bring up a new menu screen.

  • First, look over the social media URLs, and make sure they are correct.
  • Next, Select the “Facebook” tab and make sure that the word “enable” under “Open Graph meta data” is purple.
  • Select the “Twitter” tab, and make sure that the word “enable” under “Twitter card meta data” is purple, and that the default card type is set to “Summary with large image”.

When people share links to your site, do you want the tweets and updates to look good and use eye-catching images?

These settings are half of what makes that possible; you will also need to use high-resolution images in your posts and pages. (I am going to cover that in a different post, but I can explain more in the comments if you like.)


C. Next up is the Yoast XML Sitemaps menu – it’s the one right after the Yoast social menu.

  • In the Sitemaps menu, make sure that the “XML sitemap functionality” is purple for enabled. This will give you the sitemap that Google wants you to add in Google Search Console. (This will be important later on).

D. And finally, I have one last setting that needs to be tweaked.

  • Go to the Yoast Advanced settings menu, and switch to the permalinks tab.
  • There is one setting that you have to change on this page, and it is the third down from the top.
  • Set the “Stopwords in slugs” so that the word remove is purple.

What that does is simplify your page and post URLs by removing what are known as “stop words” (prepositions, some adjectives and adverbs). Yoast will remove those words from the URL for any posts or pages you publish from here on out. According to experts, this helps your SEO.

O O O

This post is now up past 1600 words, and it is still short of a lot of the explanations required to really help you understand why I am having you take each step. (This is why I didn’t record that video.)

Nevertheless, I still thought this post could be useful. (If nothing else, it forced me to formalize my process for setting up this plugin.)

If you have any questions, or noticed a mistake, please leave a comment.

Author Blogging 102: a Practical Guide to Developing Your Weekly or Monthly Link Post


Content curation (or as I prefer to call it, "link posts") is a great way for authors to help both their readers and other writers by one, pointing readers articles worth reading, and two, giving other writers public kudos by including their work in a post.

But if you’ve never created a link post before, it can be difficult to tell where to begin. I can help with that.

This post boils down my experience with curating link posts and lays out a practical step-by-step guide that you can use to both develop your link post and to set up the procedures you will need to consistently publish your link post on a regular schedule.

Link Posts on My Blog

I have been curating a daily link post on and off since since 2010, and in that time I have also published other bloggers' weekly and monthly link posts. Currently I am publishing my own Morning Coffee link post as well as Paul Biba’s weekly link roundup (from his Twitter feed). Both are posted on The Digital Reader. I also curate the weekly ebook link post for MediaShift, and am in the process of developing a link post for the EPUBSecrets blog.

I’ve been doing this so long that I have developed hard and fast rules on what should and should not be included. Here are my guidelines for curating a link post.

  1. Read everything you include in the link post. You don’t want to link to a piece which is nothing more than a snippet with link, or is itself a link post. You should also avoid posts where the blogger got their facts wrong, or where the blogger wandered off-topic (unless the diversion is entertaining).
  2. Do not include your own work – unless you are directly responding or rebutting to one of the other links. Remember, the value of content curation is in helping readers find new content, not your own.
  3. Set a schedule, and keep to it. If you can only commit to once a month or every other week, that’s fine.
  4. Keep it short. No one wants to read a link post with 30 links; readers' eyes will glaze over by the tenth link, or they will be interrupted, or they’ll simply be overwhelmed. Try to aim for links to six to ten stories.

I will be honest with you – I break these rules all the time. But I do try to follow them (especially the first two) because I have found, as a reader, link posts that consistently ignore the first two rules have little value to me as a reader.

Keep these rules in mind as you develop your link post and readers will appreciate your curation efforts more.

Readers will also appreciate your work more if you put time into developing your own procedures before publishing the first link post, and I can help you with that. Over the past 8 years I have developed a number of guidelines or best practices and I have refined my techniques to the point that I can get a link post done in under half an hour (longer if I stop to read everything before rather than after completing the link post).

I have boiled down setting up a link post (or newsletter) to five key components.

  • Sources
  • Topic
  • Timing
  • Format
  • Graphics

Sources

The first thing we have to do is shoot all the lawyers – er, find stories to link to. Here are some of the tools I use to find stories.They are all free, too.

  • Twitter – Facebook is where people go to hang out, but Twitter is where you will find the news junkies. We not only tweet links that you can find through twitter search, but we also collate lists of sources. I myself have created four lists of Twitter users who share a lot of links, and I follow a half-dozen lists made by others.
  • Google News , Bing News – Just put in your favorite keywords, and these two niche search engines will give you an endless, constantly updated stream of news stories. Based on different algorithms, Google News and Bing News will give you different results, but they do share one deficiency – they’re biased towards a strict definition of "news", which means they will miss a lot of the more interesting blog posts and other commentary.
  • Feedly – Here’s an old-school solution for you. Way back in the time before people shared lots of links on Twitter (about six years ago) news junkies used to have to subscribe to news sites and blogs, and then periodically check to see if those sites had published new articles. We used services like Feedly to stay on top of all those subscriptions.
  • Google Alerts – do you know what’s even better than looking for news? Having it come to you automatically. Google Alerts lets you follow search results for just about any search term. Whenever a new result is found by Google’s bots, you’ll get an email with the news.

Topic

It’s hard to say how you should pick a topic, but I do have a few ideas.

An author might find that their readers are interested in topics related to the author’s work. Fantasy readers might like links to articles about armor and archaic weapons, or historical trivia. SF readers might want to read about the latest theories in faster than light travel, or other new technologies.

What catches your attention? What do you think your readers will be interested in?

And is anyone else focusing on that topic for their newsletter or link post? (You don’t want to copy someone else’s idea and come out looking second rate – or worse, a plagiarist.)

Timing

Do you want to publish your link post once a week, everyday, or once a month?

The answer to that question really depends on how much time you can devote to this project, and how many linkworthy stories you can find. But what matters more than how frequently you publish is that you set a schedule, and pick the optimum time. MailChimp and other newsletter services will tell you that timing matters. Publish a post when everyone is busy and readers are more likely to simply skip it and get back to what they are doing.

They are correct, but alas, I can’t answer this one for you; the optimal time will depend on your readers. (Although, if you do decide to publish the link post a newsletter, MailChimp can recommend a publication time.)

Format

Before you publish your first set of links you will need to make three decisions about the formatting. Obviously you will need a title, and you will also need to write a one- or two-sentence intro for your link post.

But the big question here is how you want to organize the links.

Do you simply want to share a list of links, or do you want to include an excerpt from each story? Or do you want to instead write a one- or two-sentence description for each piece you link to?

There’s no single best option. I like to use article titles, but Joel Friedlander and many other bloggers use excerpts. Both work, but speaking as a reader I have also found that I am most likely to click a link in a link post if the curator wrote that one-sentence summary.

As the curator, the decision is up to you.

Graphics

It is always a good idea to include an image related to your topic or to one or more of the linked articles. It’s not just that it makes your link post look better but also that the right image will help your post get more attention when people share your post on Twitter or Facebook.

I make a point of using a photo of a coffee cup with my Morning Coffee posts because of how it ties into the title, but I also sometimes find an image that I want to share as one of the links (this drawing of owls on coffee, for example).

Another option would be to use the same image for every link post. I got this idea from MediaShift, where they have specific images for each of their daily link posts and for their once-a-week link posts.

Their images include the title of the link post on a background that conveys the topic. Here’s one example:

You can find an image on Flickr or a free image site (just make sure you comply with the license), and then you can go to Fiverr to find an artist to add text to the image.

I paid ten dollars to get text added to this photo:

In the interest of self-flagellation, I think the font choice could be better, but all in all that image works.

O O O

So there you have it; a practical step-by-step guide you can use to take your link post from idea to reality.

Link posts have been one of the more popular features on my blog over the years, and when done right they can generate a lot of traffic, help other bloggers gain recognition, and help readers stay up to date with the most important stories.

If you add them to your blogging routine I am sure your readers will like them as much as mine do.

image by ThoroughlyReviewed via Flickr

A Dozen Awesome Gmail Hacks

Gmail is possibly the most widely used email service, but are you getting the most out of it?

The following 12 Gmail hacks will help you take control of your inbox and go from being a Gmail user to a Gmail expert.  Read on to save time, avoid mistakes, and add a dash of style to your inbox.

Unread Message Icon

Do you check your inbox every five minutes just because someone might have sent you an urgent email that requires your immediate attention?

Well, now you can relax and let Gmail do the work by enabling the Unread Message Icon feature in Gmail Labs.

Look in the Labs tab of the Settings menu and you will find an option called "Unread message icon". When enabled, this feature adds a number in Gmail’s browser tab which tells you how many emails you need to read.

This trick doesn’t work so well for those of us with thousands of unread emails, but if you regularly achieve inbox zero then this could be just what you need.

Use smarter searches

Everyone knows that you can use the Gmail search bar to look for emails to and from specific names (To: and From:) or under specific labels (label:) but did you know you can also exclude labels, senders, and recipients?

It’s true!

If you want to exclude a sender from a search in Gmail simple add a dash "-" before the From tag. For example, "-from:[email protected] " will exclude any search results.

The same trick works for the To tag and the label tag.

Don’t fall for phishing emails

Scammers are getting pretty good at sending emails which you can’t tell from the real thing. This is why everyone warns you to not click a link in an email but instead visit a company' website.

Luckily, Gmail has an experimental feature which can help you separate phish from fowl. Look in the Labs tab of the Settings menu and you will find an option called "Authentication icon for verified senders".

When enabled, this feature checks the sender’s email address and adds a key symbol whenever it can confirm that the email is legit.

Use Gmail offline

The Gmail website is a great way to get work done while you’re online, but did you know that you can also use it offline (just like you do the apps)?

Google has released a Chrome extension which lets you keep on writing drafts, deleting emails, and so on, even though you have no connection to the internet. You can find the extension in the Chrome Web Store.

Themes

The Gmail website can get awfully boring to look at if you use it day after day for years on end. Google doesn’t change the interface very often, but you can.

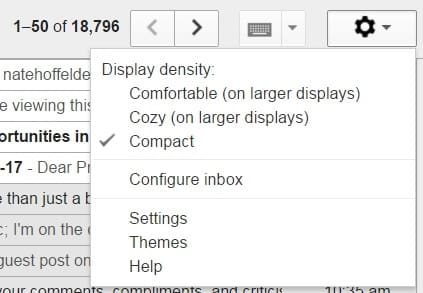
One of the options under the Gear menu in the upper right corner is the Themes menu. You can change the background to any one of dozens of images or colors.

This feature is particularly useful if you maintain multiple Gmail accounts. You can give each one a different theme and save yourself from sending a personal email from the work account.

Use Tasks to add emails to your to-do lists

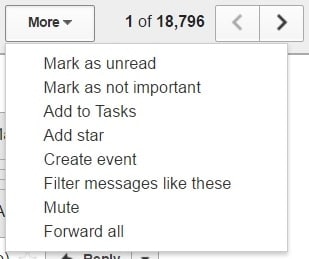
When you get an email that requires action on your part, and you can’t get to it right away, look at the menu bar above your emails. If you’re in the reading view, you’ll see a button marked “More”. Click that button and select the Add to Tasks option. This adds the email to a little to-do list.

Dropbox for Gmail

Do you like using Gmail and want to pair it with Dropbox rather than Google Drive?

Dropbox for Gmail is a Chrome extension that adds a Dropbox button to Gmail’s Compose window. This button makes it easy to share Dropbox links in an email, and it allows you to bypass the process of attempting to email large files — and saves valuable space in your inbox.

Yes, Gmail solves this problem by uploading large attachments to Google Drive, but if you already have all your docs in Dropbox then why not simply share a link?

Dropbox has more info.

Mute Conversations

Have you ever found yourself subscribed to a mailing list, and the current topic has nothing to do with you?

If you don’t want to unsubscribe and you don’t want to have to keep deleting the unwanted emails, you can easily stop the friendly spam with the Gmail mute function. Simply select the conversation, open the More dropdown menu, and select the mute option.

The conversation will stay muted until you un-mute it; it will also un-mute itself if your address appears in the To or CC box in the message header.

Use smarter filters

Filters are one of the easiest ways to automatically triage your inbox so you can focus on the important emails and let the cat photos wait. But did you know that you can add keywords to your email address and then use filters to sort the matching emails?

One of the cooler tricks with Gmail is that you can add a plus sign to your existing email address and Gmail will ignore anything after it. For example, my Gmail account is [email protected], but if you send an email to natehoffelder+amazon@gmail.com it will arrive in my inbox just as quickly.

I use this trick to sort emails from services like Paypal and Amazon. I have to first sign up with the modified email, but after that any emails they send me will be caught by the appropriate folder and labeled for my review.

Save space by deleting  only the largest emails

If you use Gmail long enough and are in the habit of saving everything (even the emails with large attachments) then chances are you might be running out of space.

You could solve this problem by deleting old emails, but there is a better solution. FindBigMail is a web app that will scan your gmail account and identify the email conversations that take up the most space.

It will tell you the twenty largest emails and which email are over 10MB or 5MB in size, and send you a simple report.

Stop senders from tracking you

It’s a fact of life that mailing lists and many other senders of emails will track whether recipients open the emails they get. (This is even an automated feature in Mailchimp and other email blast services.)

I don’t know about you, but I want to keep at least a small fragment of privacy. That’s why I use a couple browser extensions to block senders from tracking my activity.

image by stephenrwalli

Seventeen Apps That Help You Make eBooks


Amazon may be quietly locking out its competition with ebook creation apps like the newly released Kindle Creator, but not all ebook creation apps tie you down to a single distribution channel.

Even iBooks Author can make and export Epub3 files now, and that’s not the only app authors can use to make ebooks.

Here’s a double handful of apps and online services which can make ebooks (let me know if I missed one you like).

First, here’s the free app I use:

Sigil

Sigil is not the best app on this list but when it comes to free alternatives there is simply no comparison.

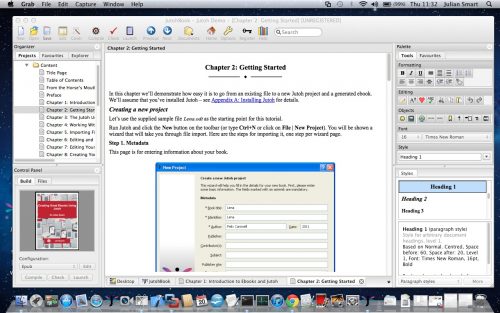
I found it easy to learn with an intuitive interface that did everything I wanted, and I am still waiting for a good reason to switch to another app like:

Jutoh

Jutoh is an ebook creation tool for all platforms (including the Raspberry Pi). It can make ebooks in all the popular formats and, aloing with Scrivener, comes highly recommended (although there is a vim/emacs divide in the author community over which is better).

WordToEpub

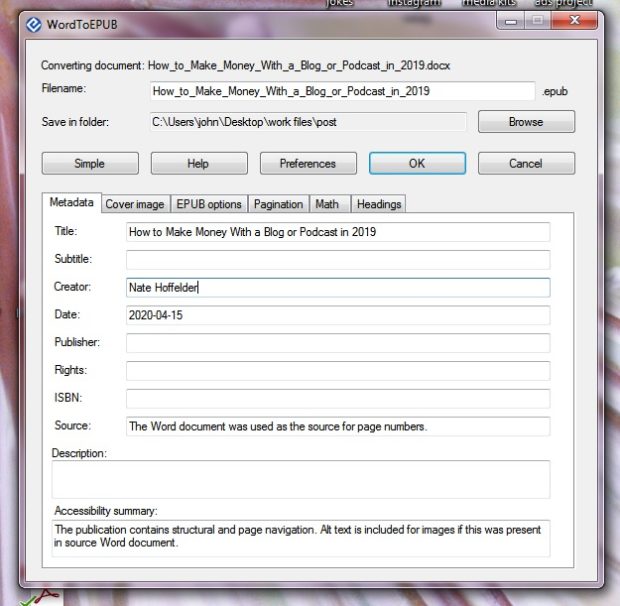
This is a Windows app from The Daisy Consortium. If you have MS Word you can use it to make an Epub3 ebook. (I do not have word, so I can’t tell you how well it works.)

Vellum

Vellum is a macOS-only app which costs so much that I can’t come up with a good reason to buy it.

It is a rather expensive app and costs either $200 for an unlimited license or $10 to $30 for each title. That is rather pricey when compared to the free apps much less the paid alternatives like:

Scrivener

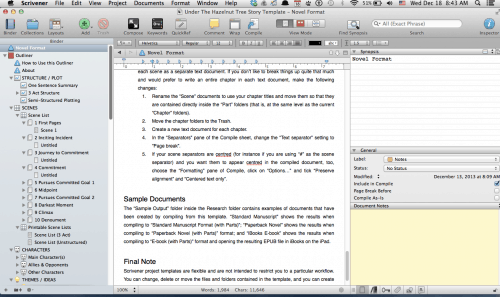
Scrivener is the one paid app everyone recommends – including those who don’t use it.

It is a complex and feature-rich app which is designed to cover all the steps in the process of creating a book rather than just the act of making an ebook. It has always been way more than what I required, but many authors swear by it.

Calibre

Calibre is known as the best ebook library tool, free or paid, but it can also make ebooks in just about any format you can name. You can even use it to edit ebooks, although you shouldn’t distribute them to other professionals.

While I use calibre to convert ebooks and manage my library, I also know that it is widely hated by many in the digital publishing industry. Calibre makes ebooks which look okay, but the code is absolutely atrocious (Calibre-made ebooks have even been banned by Amazon once or twice).

Caveat Emptor.

Calligra

Calligra is the office suite which used to be known as KOffice way back when. It was originally developed for Linux systems and has since been ported to Windows, macOS, freeBSD.

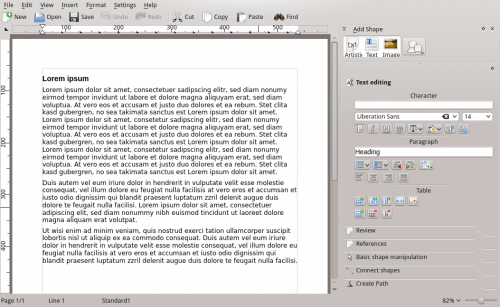
Calligra has included an ebook export option since 2012, although I am not sure very many people are using it.

eBookBurn

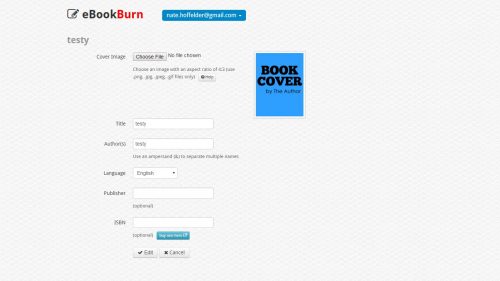
eBookBurn is a paid web service I have been meaning to try. It costs $19 to export an ebook in Epub and Kindle formats, but you can set up as many ebooks – or parts of an ebook – as you like.

Pressbooks

Do you know how they say that a third of the web runs on WordPress?

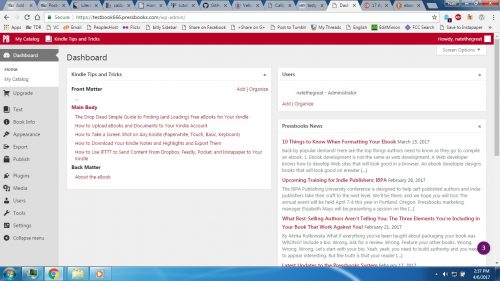
That includes Pressbooks. This paid service lets you upload (or type) parts of a book, edit them, and then export an ebook in Epub, PDF, or Kindle format.

Everything except for the last step is free, and you can even set your preferred formatting as CSS. what’s more, WP is designed to publish to the web, and Pressbooks takes advantage of this. You like you can upload a book and then show it off and get feedback.

O O O

When I published a list of eight apps and services you could use to make an ebook about a week back, a bunch of readers responded with suggestions for other apps they either liked to use or had developed.

I think more info is usually better, so here are six more apps and services you can use to make an ebook.

Atlantis

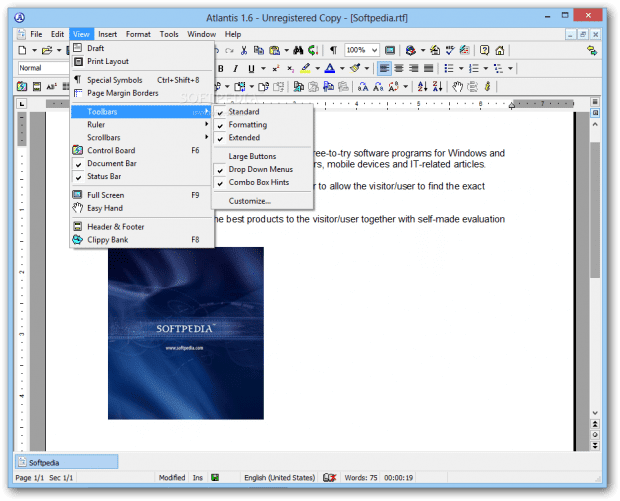
In this day and age almost everyone has to use MS Office, Google Docs, or Libri Office in order to stay compatible with their colleagues, so you would think that the lesser known word processing apps would simply wither away and die.

Atlantis would suggest that is a faulty conclusion. This app doesn’t get much attention but it is still popular with some authors.

Draft2Digital

This company is known for being one of the best ebook distributors, but you can also use their service to produce an Epub from your source Word file. This is strictly intended as a proof copy, but there’s nothing stopping you from using it like any other ebook.

PublishDrive

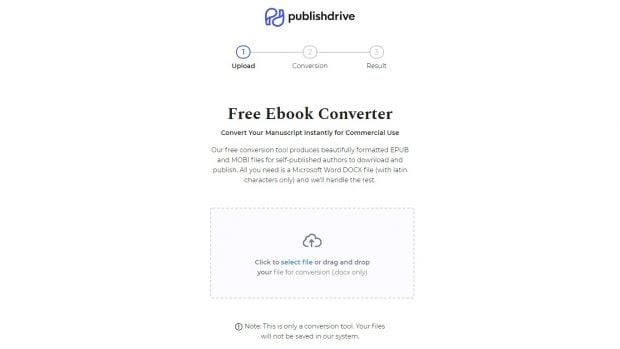
eBook distributor PublishDrive launched their ebook conversion tool in early 2019.

Papyrus

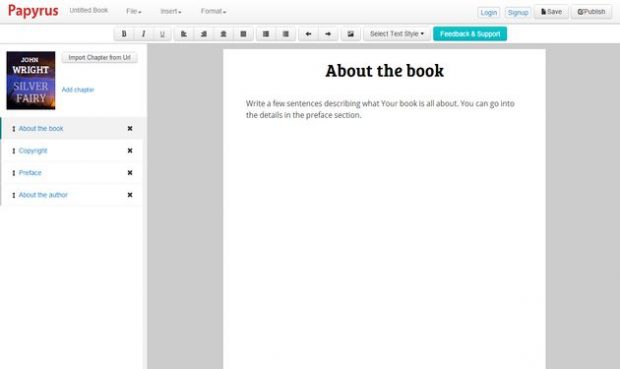
This online editor can help you make an ebook from scratch, or you can use it to assemble an ebook from blog posts and web pages.

I found Papyrus really useful when I tried it two years ago, but it won’t work for me today. For some unknown reason it is kicking me out of the ebook project I started two years ago.

Oh, well, maybe I will try this next service instead.

Bookbinder

Edit: This service no longer makes ebooks.

This online service costs $19 per title and is entirely new to me.

It offers both a simple conversion as well as an online editor you can use to format an ebook.

Libre Office

This open source office suite gained the ability to export Epubs with its 6.0 release. It could already make PDFs.

Viewporter

Viewporter is a relatively new app that makes Epub3 ebooks. I don’t know anyone who has used it, so all first-hand user reports would be appreciated.

Kotobee Author

Kotobee Author is an ebook creator and Epub editor, allowing you to add interactive content that can be opened  in any compliant Epub 3 reader. Convert your PDF to EPUB, customize the look and feel of your ebook apps, and emulate the result on different platforms and devices. It can also make web apps, and is available for Windows and macOS.

WordPerfect

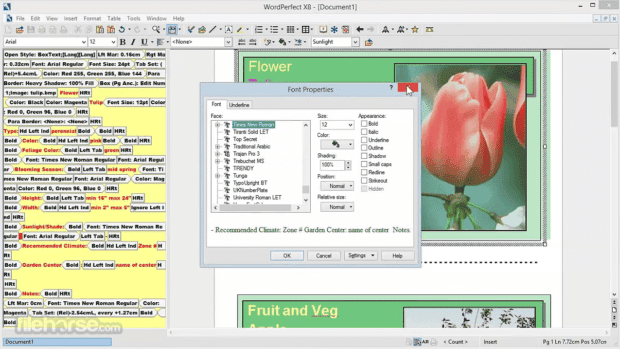
In just a few clicks, save WordPerfect documents in the popular Epub ebook format for easy publishing to popular devices. Improved file format compatibility enables users to save WordPerfect files in OpenDocument Text (ODT) format, while updates to PDF functionality give control over the resolution of linked and embedded content.

Roundup: Publishing Services Marketplaces

Hiring the right pro to assist in publishing a book can sometimes make or break a project, but how do you go about finding them?

7023561195_f30a5d0281[1]

The answer to that question is probably going to change with time, but right now authors and publishers can find industry pros through one of the several startups that have launched listing services.

Two different services have launched in the past month. That makes six seven different ways to find and hire a pro (that I know of), which is enough for a listicle.

First up is Smashwords. While they are primarily known as an ebook distributor, for the longest time Smashwords has been maintaining a list of ebook formatters and ebook cover designers. Those are just two of the skills an author might need to hire, but if that’s all you need then you need not look further.

This online forum maintains a directory of freelancers and companies that offer services to authors. It is not a marketplace so much as it is a yellow pages directory, but it’s still worth a look.

Launched in 2018, StreetLib Market is a late addition to this list. It is a true marketplace where services are listed with a price tag, and you can find everything there except web design.

Next up is Bibliocrunch. This 3 year old startup is more focused on offering a concierge/mentoring service, but it does also offer a marketplace where authors and publishers can meet and hire freelancers to work on a project. BiblioCrunch offers a free membership tier as well as a paid membership with more services and support.

Just launched into beta last month, Reedsy is one of the newest of the services mentioned here. It’s free while the bugs are worked out, and offers a curated list of freelancers.

This is one of those startups which is hard to quantify. It doesn’t offer a marketplace so much as it offers a listing service for freelancers, while at the same time building a community through local events and around its blog.  With more categories than you can shake a stick at, BM can connect you with freelancers who can do almost anything.

Blurb has made a name for itself in distributing POD books, especially graphics intensive books like coffee table books, but in the past year Blurb has expanded to include ebook distribution and other services.

And last week Blurb launched a skills marketplace called Dream Team. That marketplace is still limited to a select number of freelancers, but it should grow in time.

This is a mailing list for copyeditors, and it also maintains a list of freelancers editing services.

And last but not least, we have White Fox. This 2 year old startup is a services provider and not a marketplace, so it doesn’t quite belong on this list. But it is similar enough that I think it serves the same needs as the other companies mentioned above.

And just so we’re clear, with White Fox you are hiring them. They contract out the work, which means that an author might not know who exactly is working on their project. But on the plus side White Fox serves not just authors but also publishers who want to hire a freelancer to write for them.

images by tiarescottibm4381

6 Things An Author Should Look For in An Indie eBookstore

If417181717_0c48ce779a_m[1] you’ve been reading the ebook news lately then I’m sure you know all about the reaction by Kobo, Amazon, and B&N when "news" broke that they were selling adult content. They removed hundreds of questionable titles as well as ebooks that did not violate any rules or laws, with Kobo even going so far as to temporarily gut their self-pub section.

No matter whether you think their response was justified or not, the events of the past few days remind us that authors can’t rely on the major ebookstores to be there forever. It’s past time that they set up a fallback position with an independent ebookstore.

They have quite a few to choose from, including Indiro, reKiosk, Gumroad, and so many others that I can’t name them all.

Rather than list all the possible options I thought it better to list a few of the things I think authors should look for. I am not an author but I have bought stuff online and I have sold stuff online. I know what I look for, and I know what features I wish the major ebookstores would offer.

Reputation

I feel that a ebookstore’s reputation is more important than payment processing, website integration, or almost any other feature. If an author uses a service with a bad reputation then they could lose customers.

For example, if there were an ebookstore with the reputation of Ebay then I would avoid it. I despise Ebay, and I only use it because it doesn’t really have any competition. Authors aren’t so lucky and they can’t afford to drive away readers.

Author Website Integration

An indie author isn’t going to be able to rely on their author page on Amazon.com to drive sales, and that means that they will need to make it easy to for a visitor to their website to buy the ebooks. Ideally this would mean that the ebookstore would offer a widget of some kind that could be integrated into an author’s website, but that is just one option.

Payment Options

Obviously an author needs to make it easy for customers to buy, and that means making sure that the payment options match up with whatever the customer is used to using.

Authors also need to make sure that they will be paid in a timely fashion and in a way that doesn’t raise their costs too much. Remember, it wasn’t too long ago that Amazon paid international KDP authors via a paper check which was snail-mailed from the US. That incredibly inconvenient delay is a marked contrast to Smashwords, which pays via Paypal.

Royalties

Most ebookstores will tell you up front the percentage of each sale which they pay, and it varies between the various services. Smashwords is one of the higher paying ebookstores/distributors, and Gumroad pays even more. Of course this last service does nothing more than payment processing and delivering the file, so it’s not for everyone.

[mailmunch-form id="683421″]

DRM

This is a hot-button topic with strong feelings on both sides. I have long been in the DRM-free camp, but I’m not going to use this post to convince you to agree with me. Instead I will point out a couple useful details.

  • If an author chooses to require DRM then they’ll have to make sure that readers can use the DRMed ebook. This will generally restrict the author to ebookstores that offer Adobe DE DRM (there are exceptions).
  • Also, choosing to use DRM will cost the author money in terms of fees paid to Adobe. The author will probably earn less on average from each sale.

Website Design

Before an author sells ebooks on a site they should first try to buy an ebook. Does the search work correctly? Do the pages load quickly and is it easy to figure out your way around? Does the cover and description lok good? And finally, can the author easily change the price for a sale?

If the ebookstore’s website doesn’t function well then it could discourage customers. And since there are a lot of competing services there is little reason to choose one which is subpar.

On the other hand this particular point is also something of a trick question. For example, Gumroad doesn’t offer any sales site at all. It just offers payment processing, content delivery, and a higher royalty rate than some of their competition.

***

There are probably a dozen or more different issues which affect this topic. I don’t think i will be able to think of them all, so I am going to throw open the comments and let authors fill in what I missed.

What do you look for in an indie ebookstore?

image by brewbooks